Enable SSH access on VMWare ESXi 5.5
SSH access on ESXi 5.5 is disabled by default. To enable SSH access, press F2 key for System Customization, the following screen is displayed. Click on Troubleshooting options.
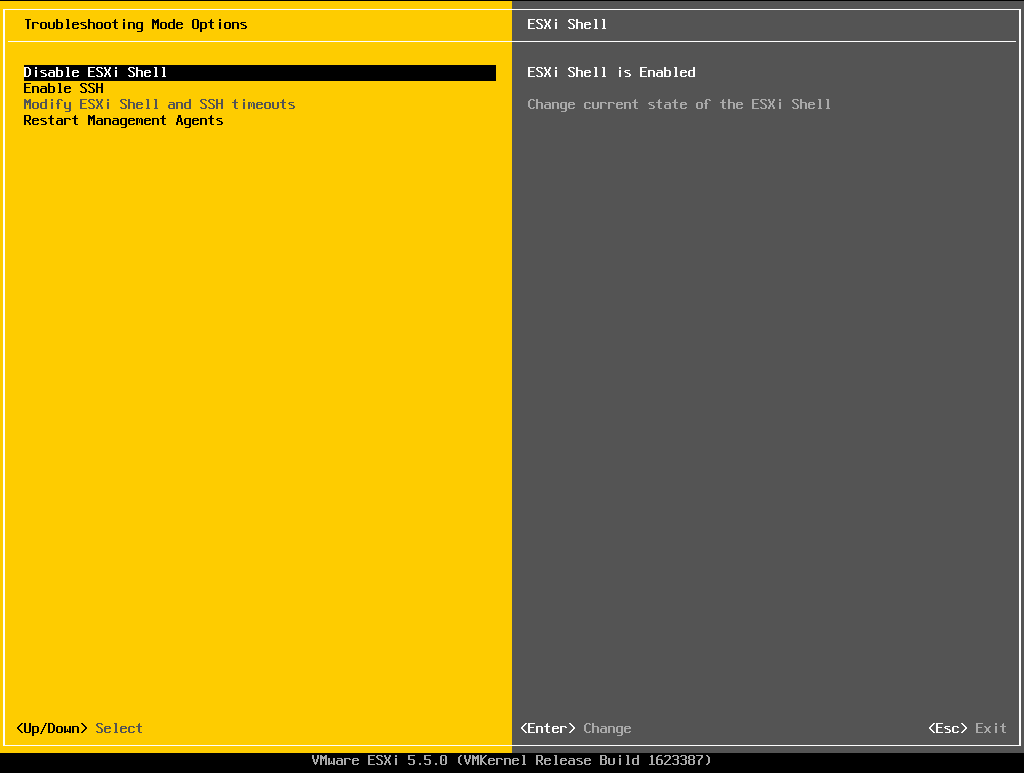
In Troubleshooting Mode Options, the first option available is Enable ESXi Shell. ESXi shell is used for some maintenance that can’t be handled with CLI interface. It is disabled by default. We can enable access towards this ESXi shell. Click on Enable ESXi Shell and press Enter.
Enable ESXi Shell option is changed to Disable ESXi Shell option and on the right side of the screen, it is shown that ESXi Shell is Enabled.
Next option available is Enable SSH. SSH is disabled by Default and it is shown in the right side of the screen. Select Enable SSH option and press Enter.

SSH is now enabled and the status is shown on the right side of the screen. SSH default port is 22. If we need to define a custom port, then we need to edit sshd_config file and set Port parameter with a value other than 22.

Restart Management Agents will disconnect all current remote sessions. Select this option and press Enter.

A confirmation dialog is shown to confirm restarting managment agent. It displays a warning that Restarting the management agents will disconnect all remote management software. This will affect all running services. Collection of extra troubleshooting information can take a noticeable amount of time. This is followed by an option to Collect extra troubleshooting information. Check this box. if we need this extra information. Press F11 to confirm.

After pressing F11, it restarts the management agents and the status is shown as Done as shown in figure below.